How to Jailbreak iOS 12.3 to iOS 13.4.1 on Your iPhone Using Checkra1n
The infamous Checkm8 bootrom exploit, first showcased by axi0mX, led to the Checkra1n tool, which aims to offer a permanent jailbreak solution for modders running on iOS 13 and beyond. The latest jailbreak method covers devices ranging from the iPhone 5s to the iPhone X. For newer iPhone models, try the Unc0ver and Chimera jailbreaks tools instead.
Using Checkra1n is pretty straightforward, though you'll need a macOS computer. Windows and Linux support should be coming soon. You should also know that Checkra1n is semi-untethered, which means you'll need to re-enable jailbreak using the same steps below each time your device shuts down or reboots. Finally, though the tool only provides support for Cydia, you can replace it with Sileo after jailbreaking your device successfully.
Note that you can also jailbreak an iPhone with Checkra1n using an Android phone or tablet. The Android device needs to be rooted, but you can use either Magisk or TWRP to get the job done. Check out those links for more details.
Requirements
Supported iPhone Models
- iPhone X (iOS 12.3–13.4.1 full)
- iPhone 8 / Plus (iOS 12.3–13.4.1 full)
- iPhone 7 / Plus (iOS 12.3–13.4.1 full)
- iPhone 6S / Plus (iOS 12.3–13.4.1 full)
- iPhone SE (iOS 12.3–13.4.1 full)
- iPhone 6 / Plus (iOS 12.4.6 full)
- iPhone 5S (iOS 12.4.6 full)
Step 1: Install Checkra1n on Your Mac
You'll first need to install the Checkra1n jailbreak tool on your Mac. To make sure the app will run properly, disable FileVault by heading to "Security & Privacy" in "System Preferences." Click the "FileVault" tab. If the feature is enabled, click the lock icon in the bottom-left and enter your password, then click "Turn Off FileVault."
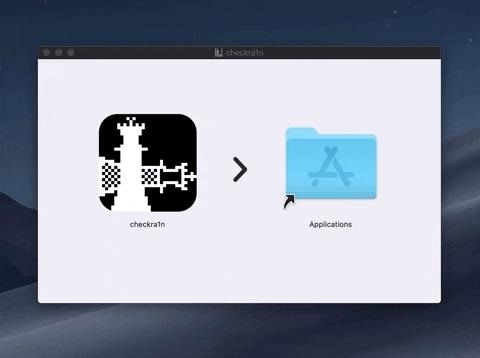
Now, head to checkra.in, click on "Get the beta now," then choose "Download for macOS." If prompted, make sure to click "Keep" in your browser's download bar. Once the file downloads, double-click it to launch it, then drag the "checkra1n" icon and drop it on the "Applications" folder to install the app.
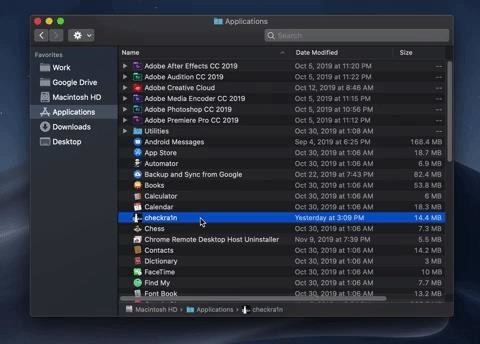
Open Finder, head to your "Applications" folder, and find checkra1n in the list. Since it's from an "unidentified developer," the app won't run until you do a little trick: Hold down the control (^) key on your keyboard, then left-click the checkra1n app. Choose "Open" from the context menu that appears, then click "Open" on the prompt. From now on, you'll be able to open the app normally.
Step 2: Delete iOS Update from Storage (If Needed)
Once you have Checkra1n set up on your computer, go to your iPhone and delete any iOS software updates you may have saved, as they'll interfere with the jailbreak and prevent it from successfully executing. Head to the following menu:
Settings –> General –> iPhone StorageInside the "iPhone Storage" page, look for any file named "iOS 13.x.x." If you find one, tap it, then tap "Delete Update," and follow the prompts to confirm the deletion.
Step 3: Plug in Your iPhone & Run Checkra1n
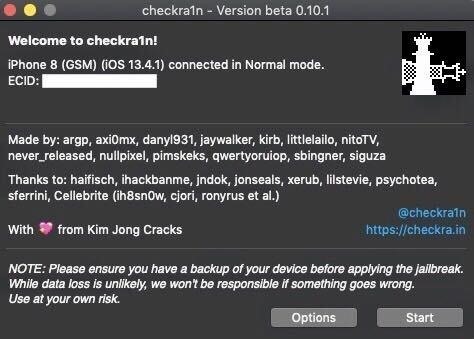
With Checkra1n open, connect your iPhone to your Mac using either a USB to Lightning cable or a USB-C to Lightning cable, and wait for the tool to detect your device. Once it does, your iPhone model, along with its current iOS version and ECID will appear. Click "Start" when you're ready to commence jailbreaking.
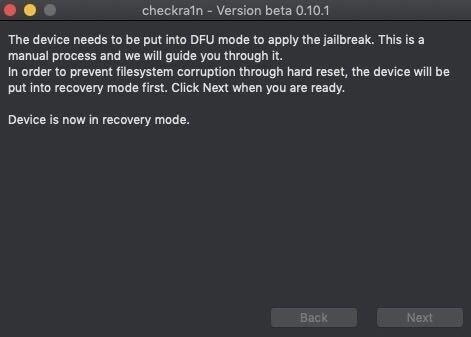
Upon hitting "Start," you'll immediately be prompted to boot your iPhone into DFU mode. But don't touch your phone just yet — wait a moment for Checkra1n to reboot your device into Recovery mode before going forward.
Step 4: Enter DFU Mode & Execute Jailbreak
Once you're iPhone boots into Recovery, the way is now clear for you to perform the steps to go into DFU mode. Checkra1n will walk you through the steps via on-screen instructions, but you can enter into DFU on your own if you're familiar with the steps. If you'd like to learn more about DFU mode on the iPhone X and iPhone 8 models, feel free to check out the link below. (Tip: If you're running macOS Catalina, it's the same process only with Finder instead of iTunes.)
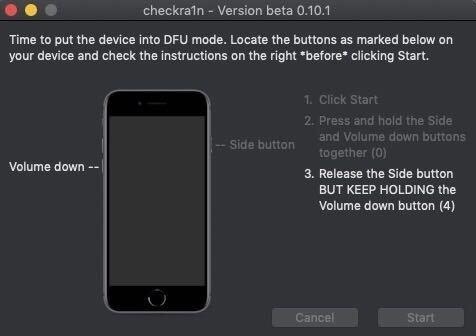
In addition, you can also follow the brief instructions below that corresponds with your device if you'd like to familiarize yourself with the steps to enter DFU mode. As mentioned above, you don't need to follow Checkra1in's on-screen guide — the app will automatically know once your device enters DFU and move ahead with the process.
iPhone X, 8, or 8 Plus:
- Quick-press the Volume Up button.
- Quick-press the Volume Down button.
- Press-and-hold the Side button until the screen goes black.
- Release the Side button once the screen blacks out.
- Quickly press-and-hold both the Side and Volume Down buttons together for 5 seconds.
- After 5 seconds, release the Side button without letting go of the Volume Down button.
- Continue holding down the Volume Down button for at least 5 seconds.
iPhone 7 or 7 Plus:
- Press-and-hold on both the Volume Down and Sleep/Wake buttons until the screen goes black.
- Press-and-hold on the Sleep/Wake button for three seconds.
- Press-and-hold on the Volume Down button without letting go of the Sleep/Wake button.
- Keep holding both buttons for 10 seconds, then let go of only the Sleep/Wake button.
- Continue holding down the Volume Down button for at least 5 seconds.
iPhone 6S or Below:
- Press-and-hold on both the Sleep/Wake and Home buttons until the screen goes black.
- Press-and-hold on the Sleep/Wake button for three seconds.
- Press-and-hold on the Home button without letting go of the Sleep/Wake button.
- Keep holding both buttons for 10 seconds, then let go of only the Sleep/Wake button.
- Continue holding down the Home button for at least 5 seconds.
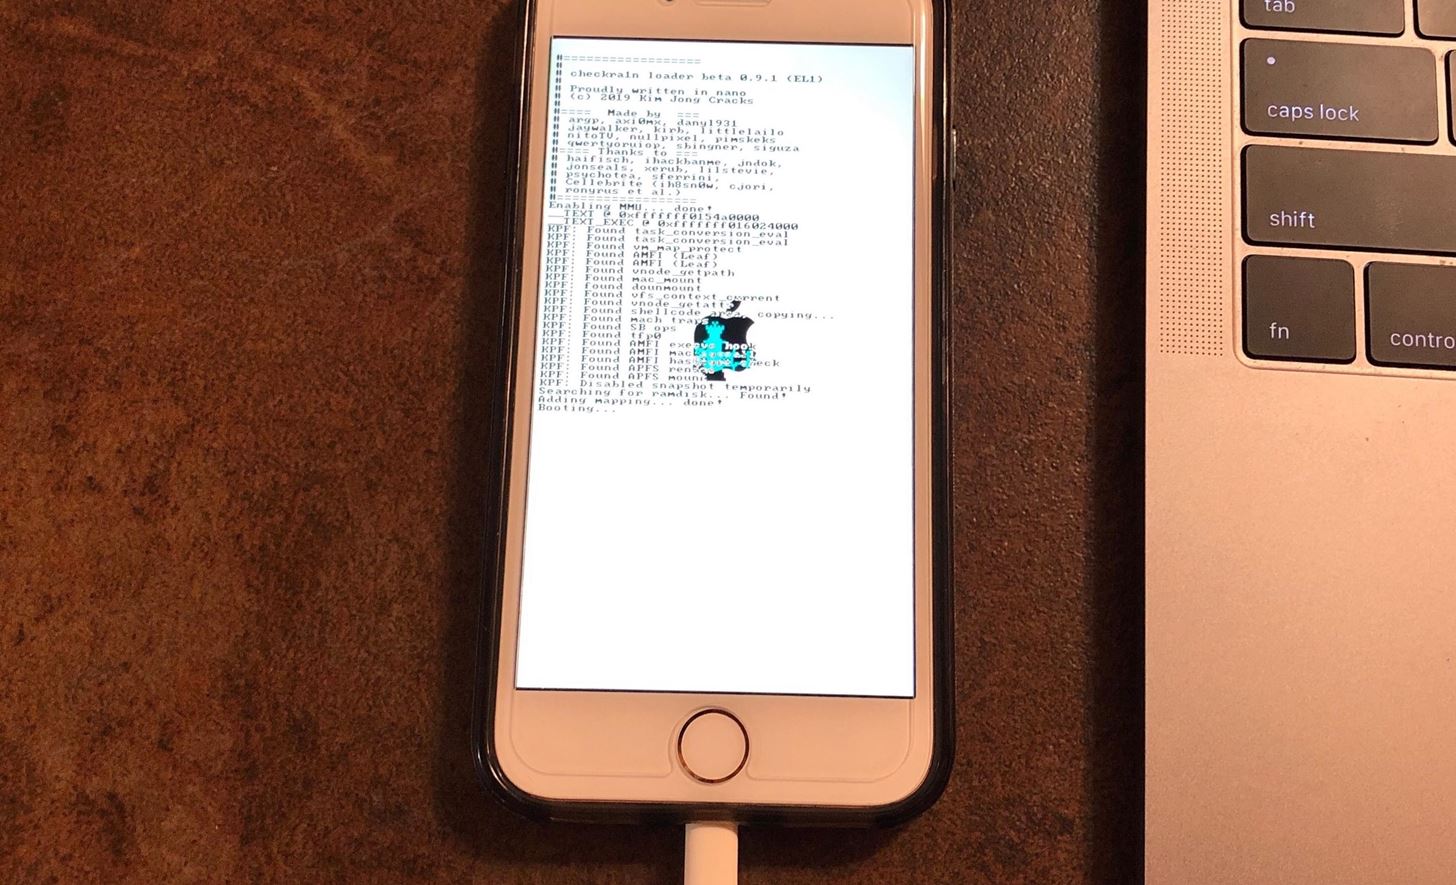
Upon entering DFU mode, Checkra1n will automatically proceed to jailbreak your device. While it's doing so, your iPhone will briefly flash a Checkra1n logo, then boot up normally, so sit back and wait for the process to complete.
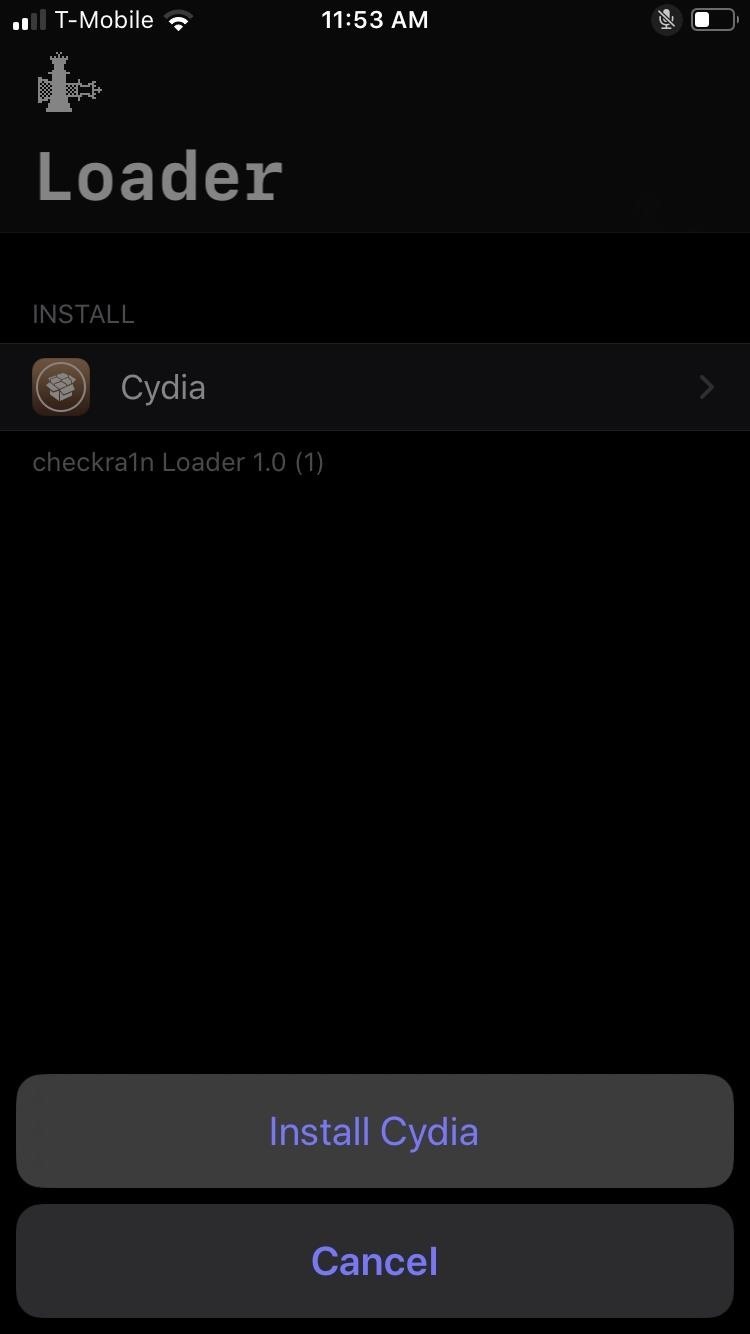
Step 5: Open Checkra1n & Install Cydia
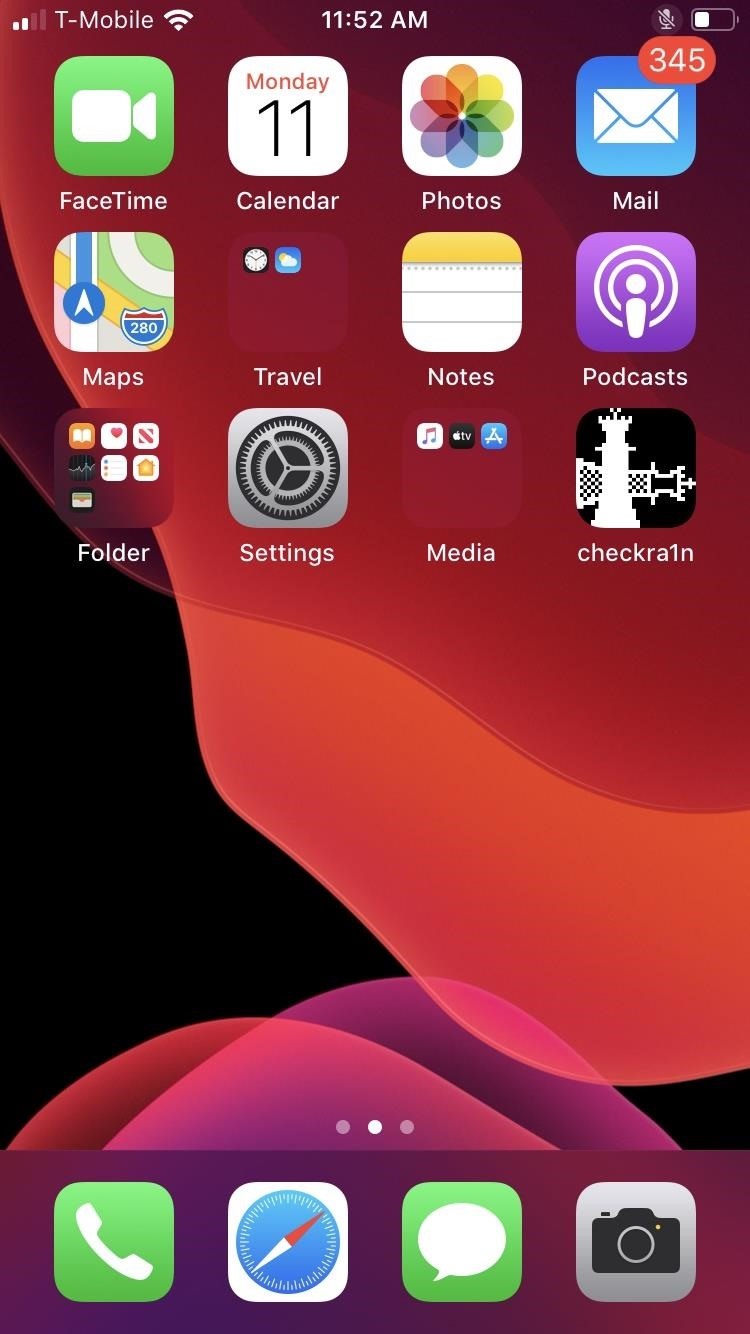
Once your iPhone successfully reboots, you'll now have an icon for Checkra1n on your home screen. Open the app and tap on "Cydia" to install the central jailbreak app on your device.
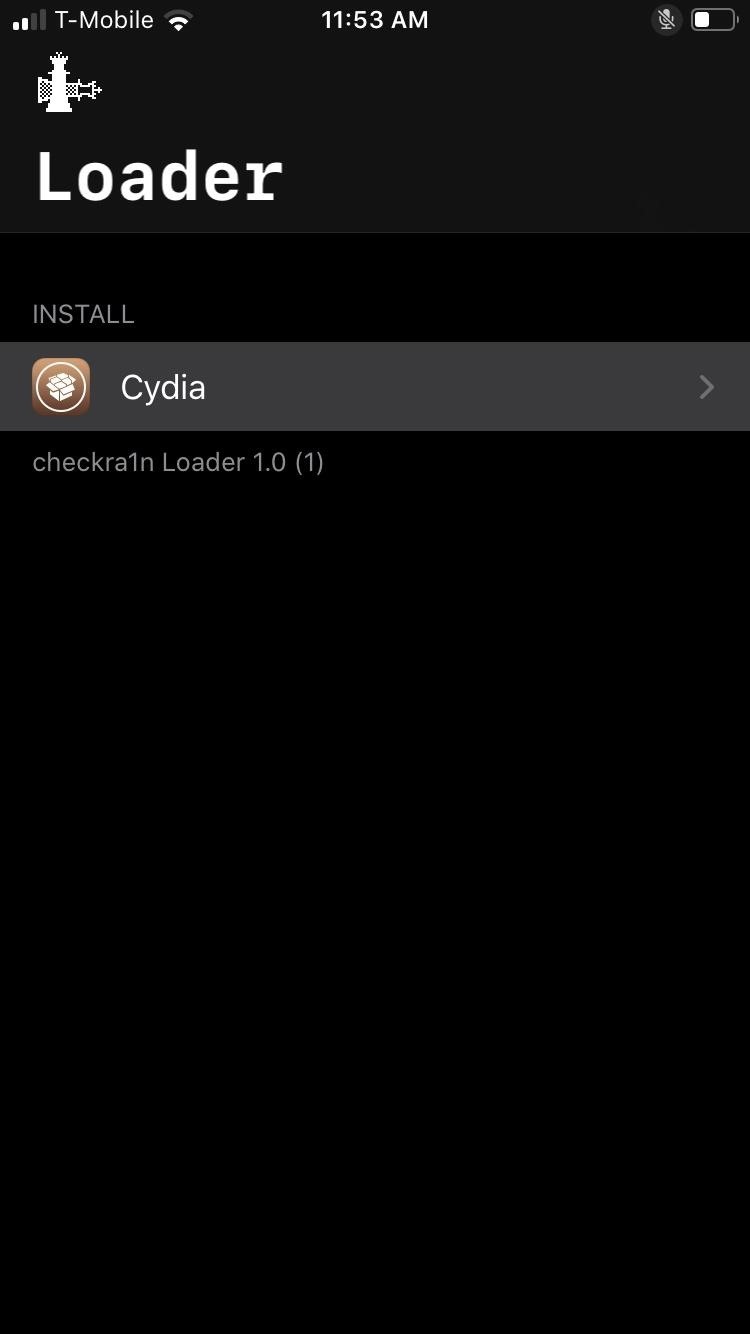
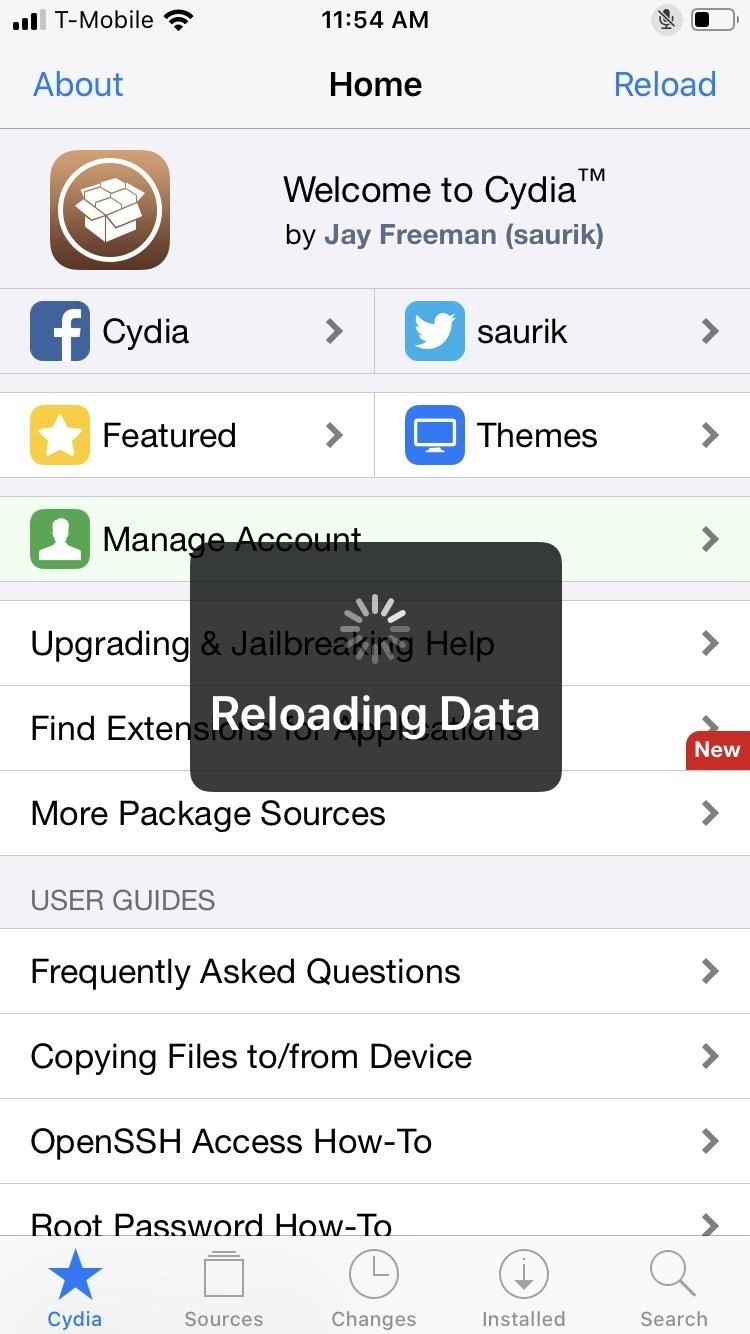
Now, confirm installation by hitting "Install" on the prompt that appears, and wait for the process to wrap up. You're now free to open Cydia to customize your iPhone through various tweaks, and we've covered a ton of great ones to start you out.
Important Notes
As mentioned before, Checkra1n is a semi-tethered jailbreak, which means you'll have to re-enable the jailbreak starting with Step 3 above each time your iPhone turns off or reboots. Once done, all the tweaks and mods you've enabled will automatically work again.
It's also worth noting that unlike previous jailbreak methods, Checkra1n works a lot more consistently across a range of devices. We tested the jailbreak tool on an iPhone 8 and iPad 6 that are both on iOS 13.4.1 and found that Checkra1n successfully modded them in just one attempt. Also, we had successfully jailbroken other iOS devices with older versions of Checkra1n.
Want to help support Gadget Hacks and get a great deal on some sweet new tech? Check out all the deals on the new Gadget Hacks Shop.
tinyurlis.gdv.gdv.htu.nuclck.ruulvis.netshrtco.detny.im